
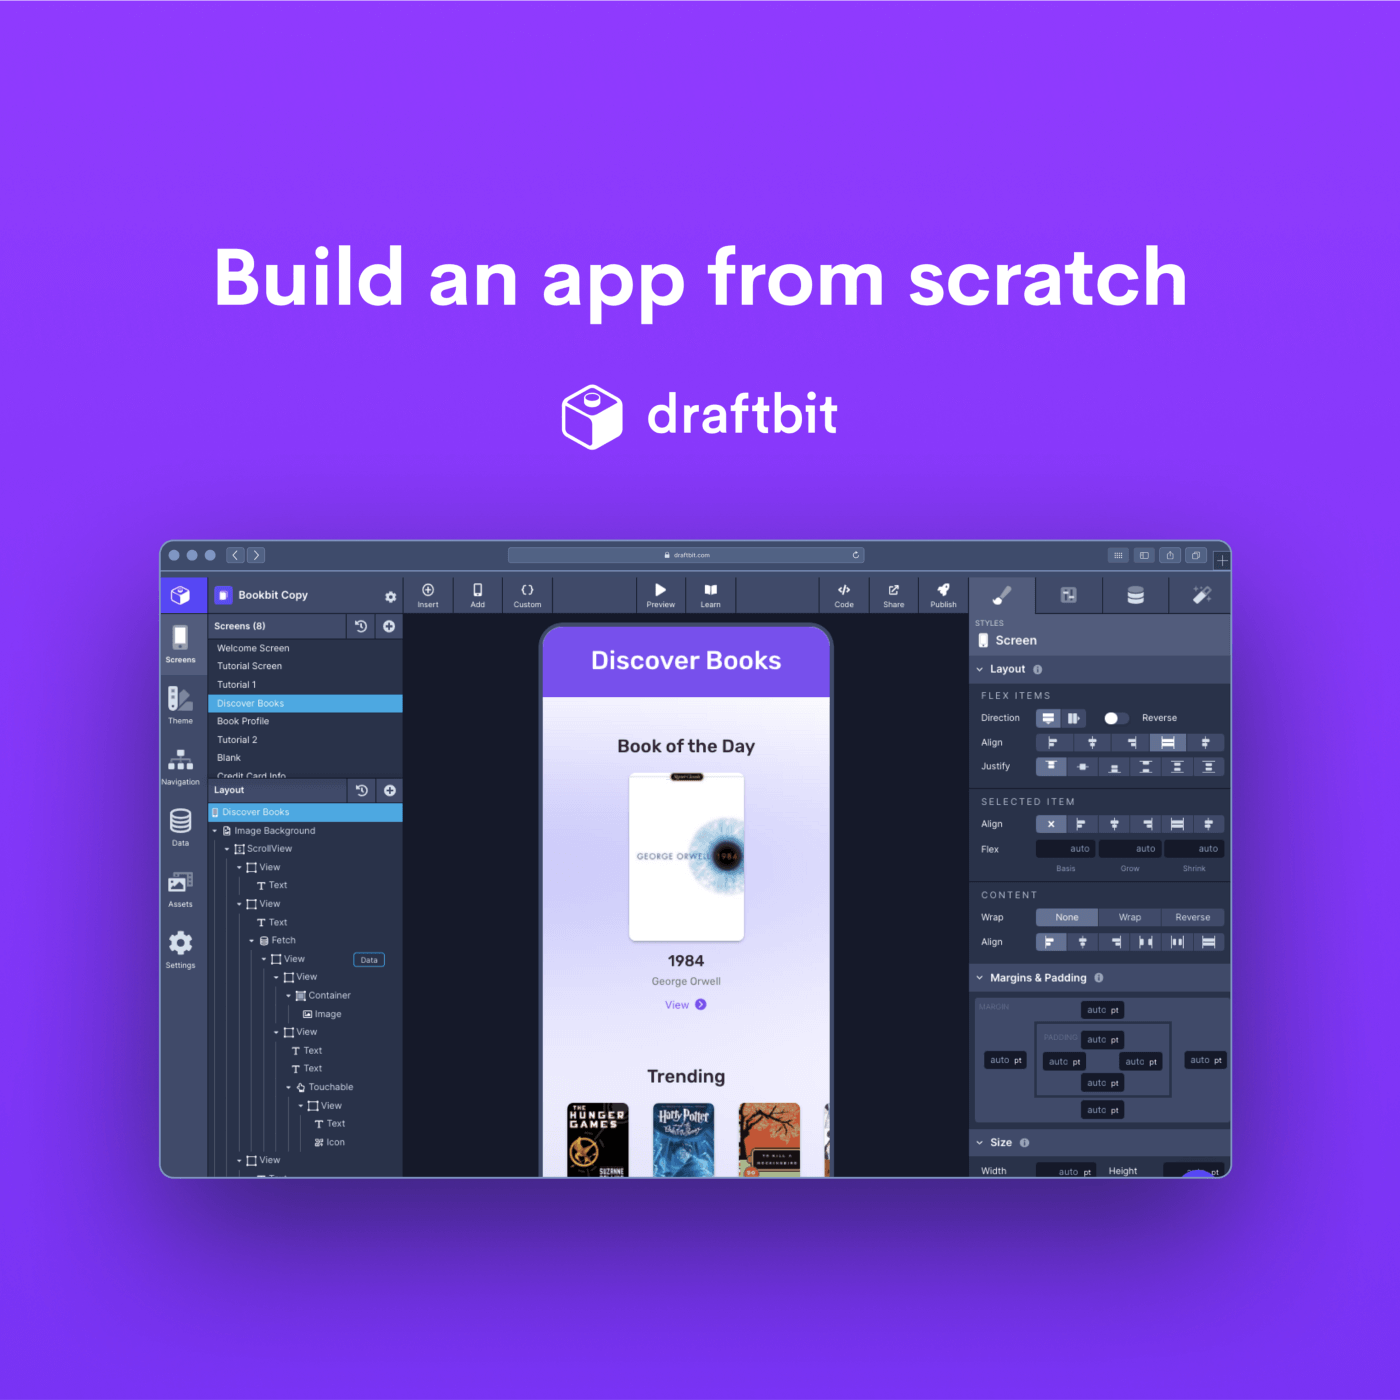
How to Fetch Data from a REST API in an App UI Using Draftbit
In the first tutorial in the series on creating a Bookbit Starter app from scratch, the focus was on covering the UI elements that the Draftbit’s Builder offer and how to implement them to create mobile app screens.
We have a new and improved tutorial series: Build an Instagram Clone from Scratch. This new series includes a real back-end, authentication, and more complex UXs. If you’d like to continue with the Bookbit tutorial, proceed! If you’d like to check out the Instagram Clone series, head over here.
In the first tutorial in the series on creating a Bookbit Starter app from scratch, the focus was on covering the UI elements that the Draftbit’s Builder offer and how to implement them to create mobile app screens. In this tutorial, let’s apply this knowledge and learn how to use real-time data in the screens when building an application.
To fetch real-time data in an app, Draftbit Builder supports integrating REST APIs. You can connect nearly any third-party Service that exposes its REST API endpoints to a Draftbit app. We have a list of REST API integrations here that are officially supported. For the current example, let’s build the Discover Books screen using Example Data API.
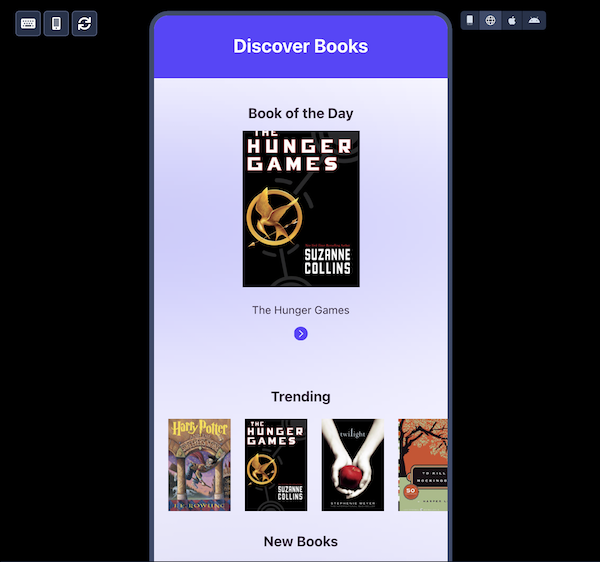
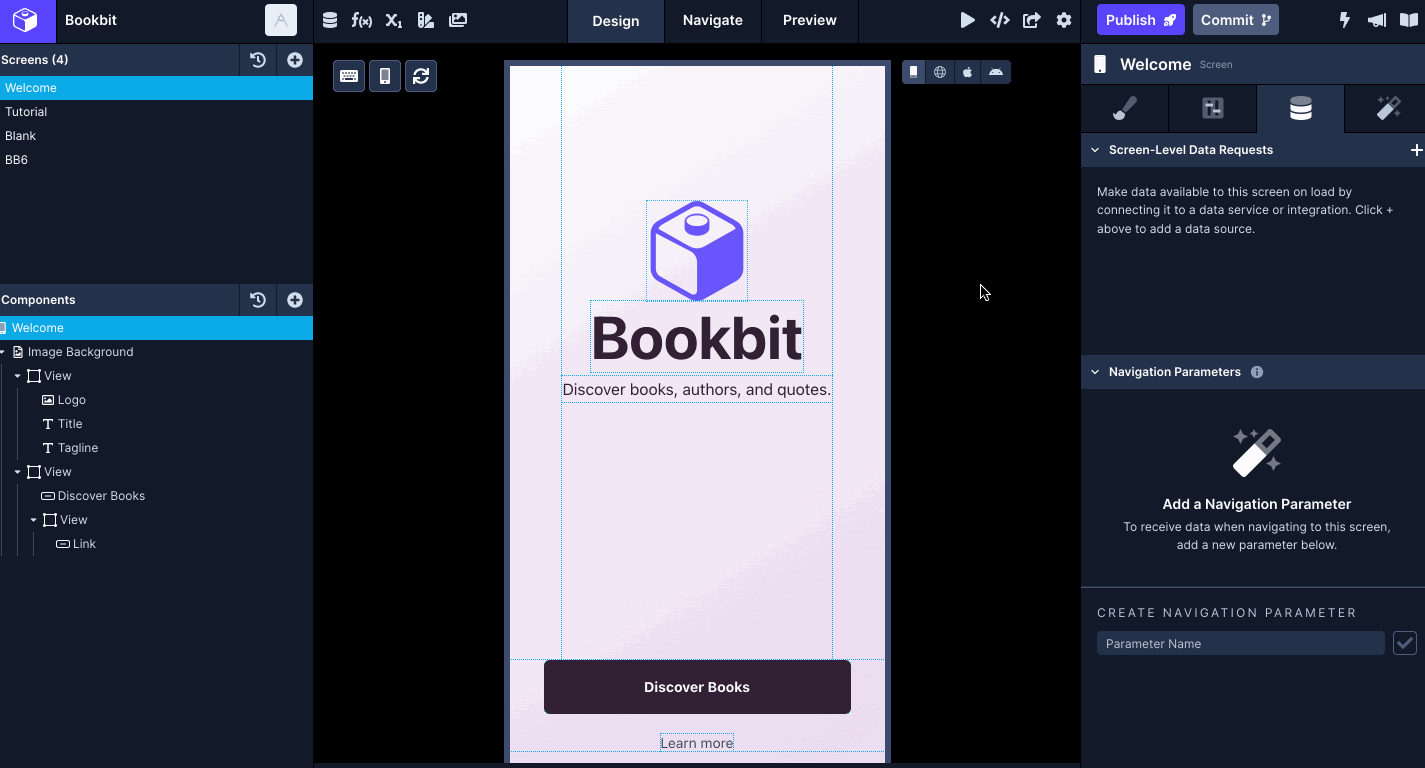
Here is what we are building
What is Example Data API?
Example Data API is a REST API service provided by Draftbit to start building a data-driven app without having to create a backend. It uses real (or real-looking) data to help you make better design decisions along the way. Data is gleaned from several open or creative commons sources. There are different data resources to satisfy specific use cases such as Books, Articles, Products, Orders, Podcasts, Product Reviews, People, etc.
Create Discover Books screen
The screen we are building in this tutorial is called Discover Books. It is going to be composed of two main elements. The first element is to fetch the data from a third-party REST API service. The second element contains the introduction of new UI components such as ScrollView, Fetch, and List to organize display the data fetched from the API service.
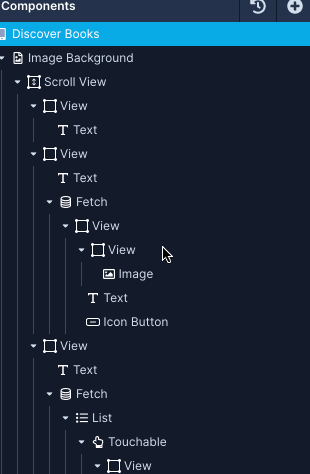
The Components tree of this screen is quite long, thus, to understand, let’s break it down into sections as we go. The requirements to build the first section is to create the following:
- Add an image background and a ScrollView
- The first section of the ScrollView contains a header and a “Book of the day” sub-section.
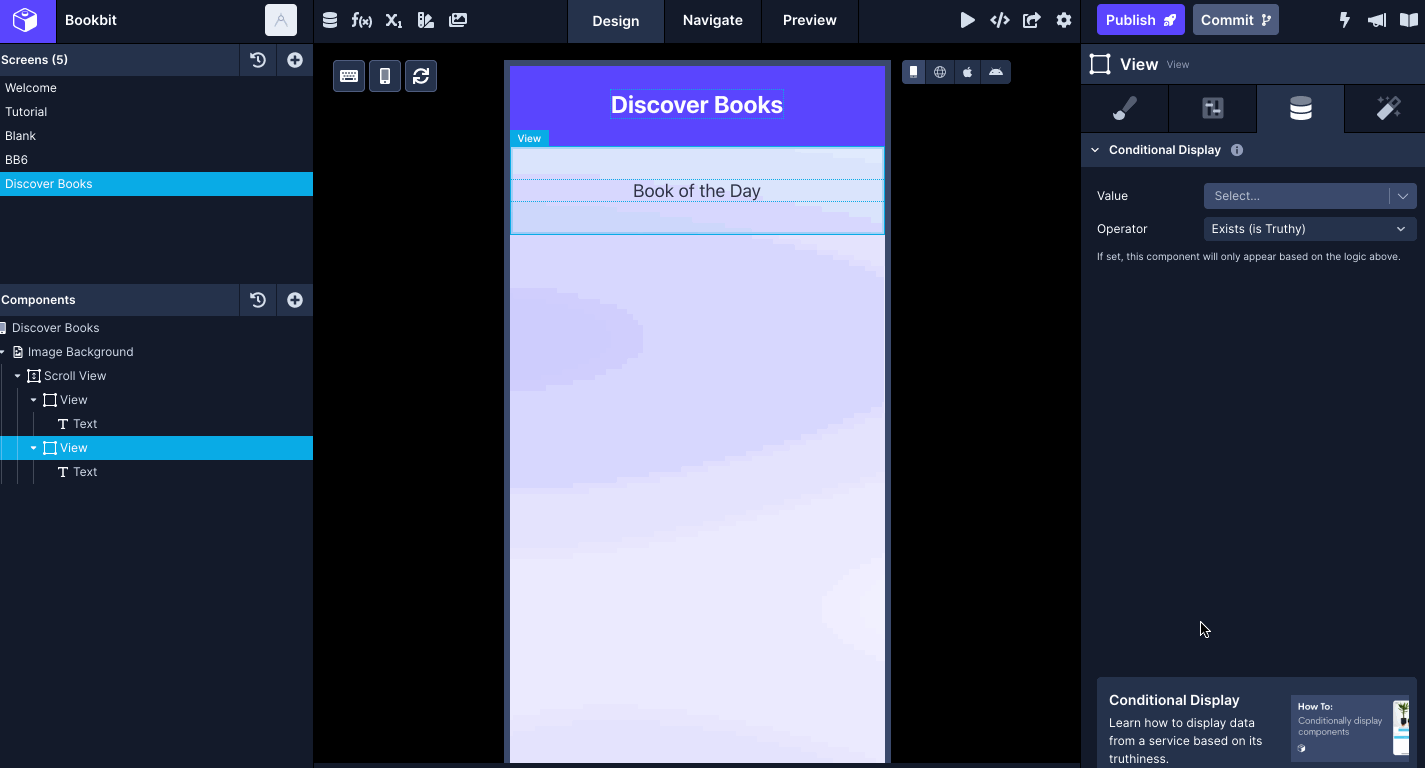
- The “Book of the Day” further includes a section title, a cover image of a book item, the title of the book, the author’s name, and a View More button with an icon. These details are going to fetch from the REST API.
Add a scrolling view
Let’ start by building the user interface of the screen first using components from the Builder.
- Open the workspace in the Draftbit Builder, then open the app you are building.
- Add a new Blank screen using the plus icon button in the left panel and call it Discover Books.
- Add a background image using ImageBackground Media component and use the same gradient background image as the Source. In the Configs tab of the Properties panel on the right side, you can set the Source Type to Static and select the image as the value of the Source property from uploaded assets.
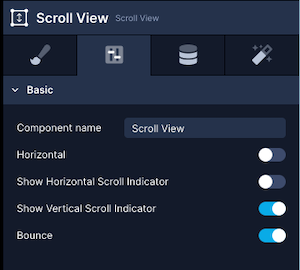
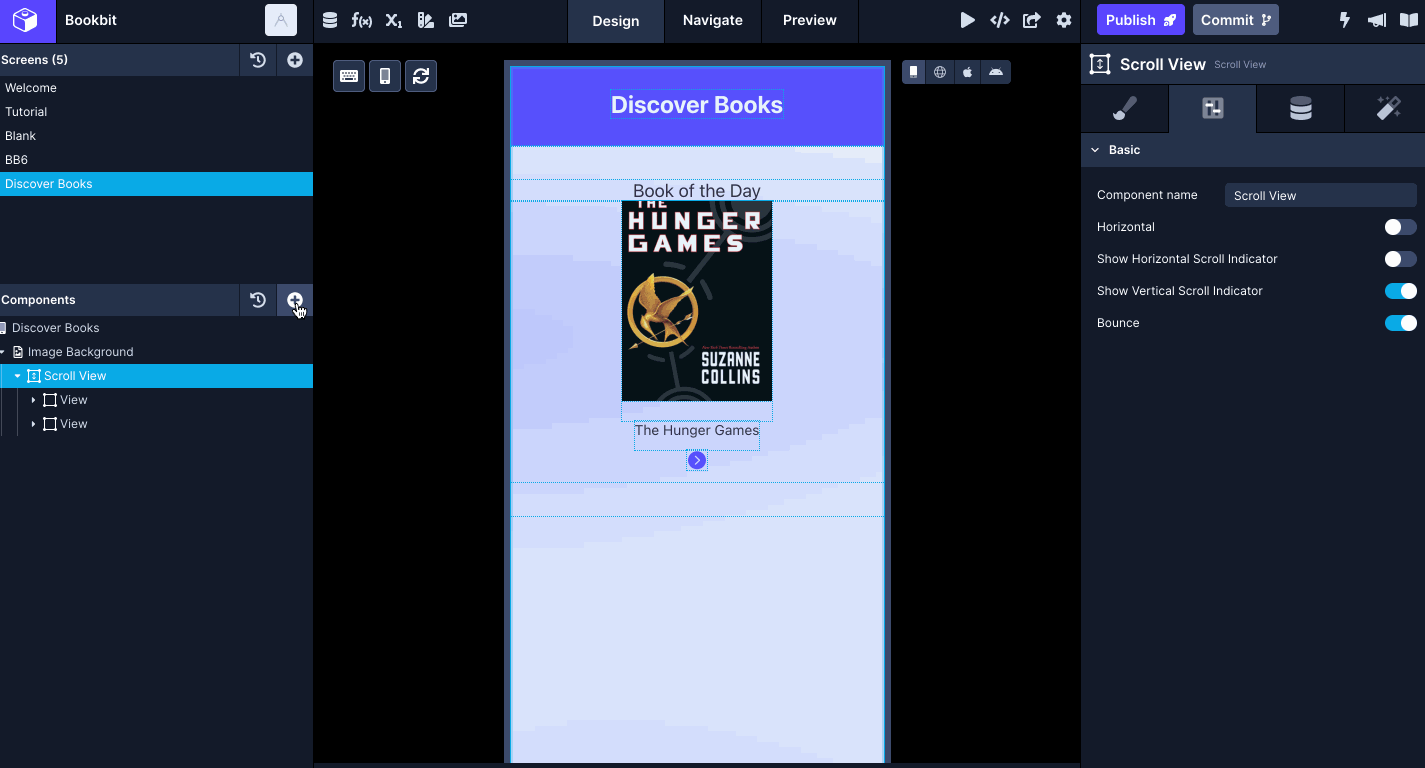
- The contents of this screen are going to be wrapped inside a scrollable view. Add ScrollView.
The default scrolling orientation of the ScrollView component is vertical. For this particular screen, let’s use the default orientation. To change it, you can go to the Configs tab:
Build a custom header
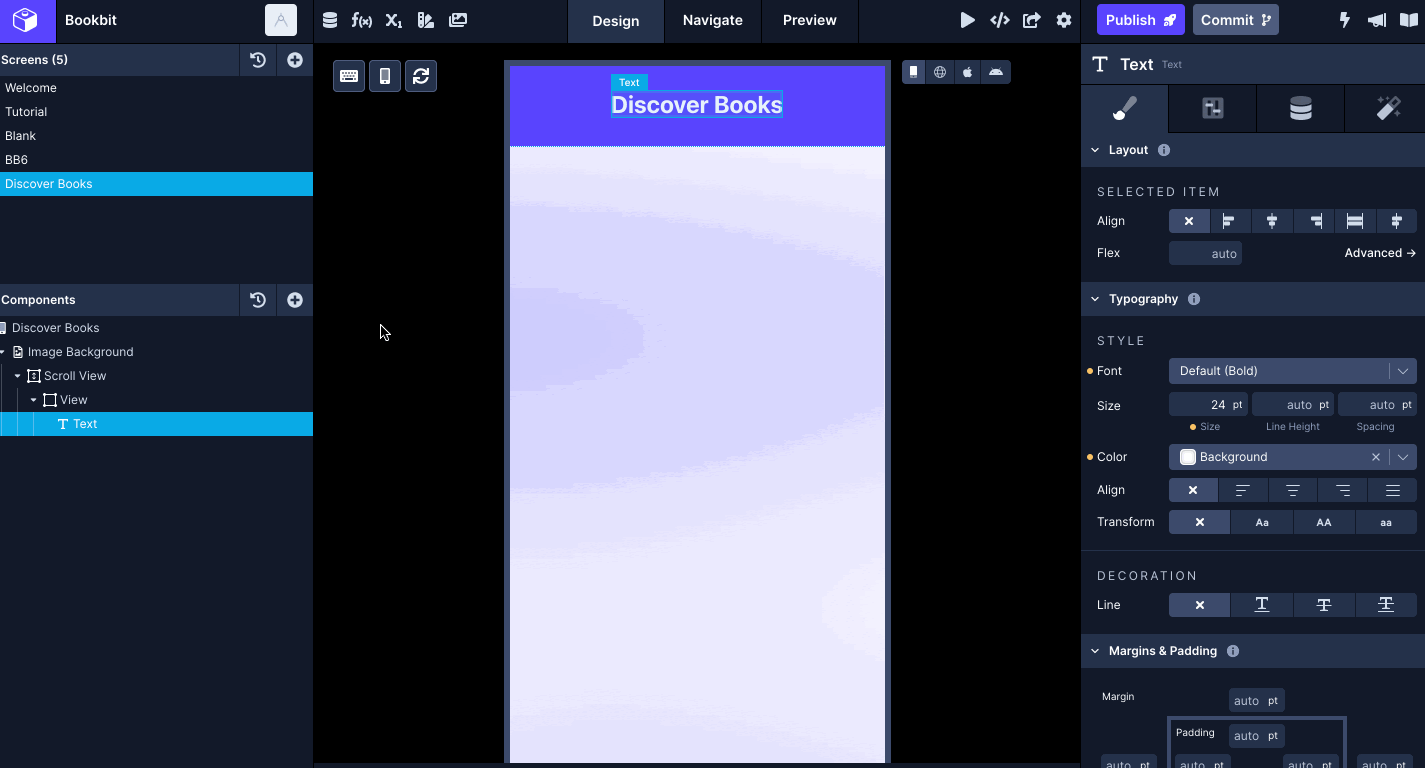
- Add a padding-bottom of 34 to the ScrollView from the Styles tab.
- To create the custom header, add a View component and a Text component as its child. Set the Align and Justify property of the View to center. Then, add the padding-top of 24, padding-bottom of 28, and a margin-bottom of 14.
- Set the background color for the View to the value of Primary, which is one of the pre-defined color values in the Draftbit Builder.
- Set the styles for the Text in the Styles tab. The Font will have the value of the 24 and the Color of the value Background. In the Configs tab, add the value for the Text component to Discover Books.

Create an endpoint to get “Book of the Day”
In this section, let’s add a REST API endpoint to fetch the book item for the “Book of the Day” section.
- To enable using a REST API, go to the API and Cloud Services modal from the top panel.
- Under the Add your Custom API section, click the REST API.
- Enter a name for the REST API service. It is going to represent the name of the Service to be displayed in the menu.
- Paste the Base URL https://example-data.draftbit.com into the Base URL field. Make sure that there is no / at the end of the Base URL.
- By default, Accept: application/json and Content-Type: application/json are the default HTTP headers in each REST API configuration. For this example, we do not require adding any other HTTP Header.
- Click Save.
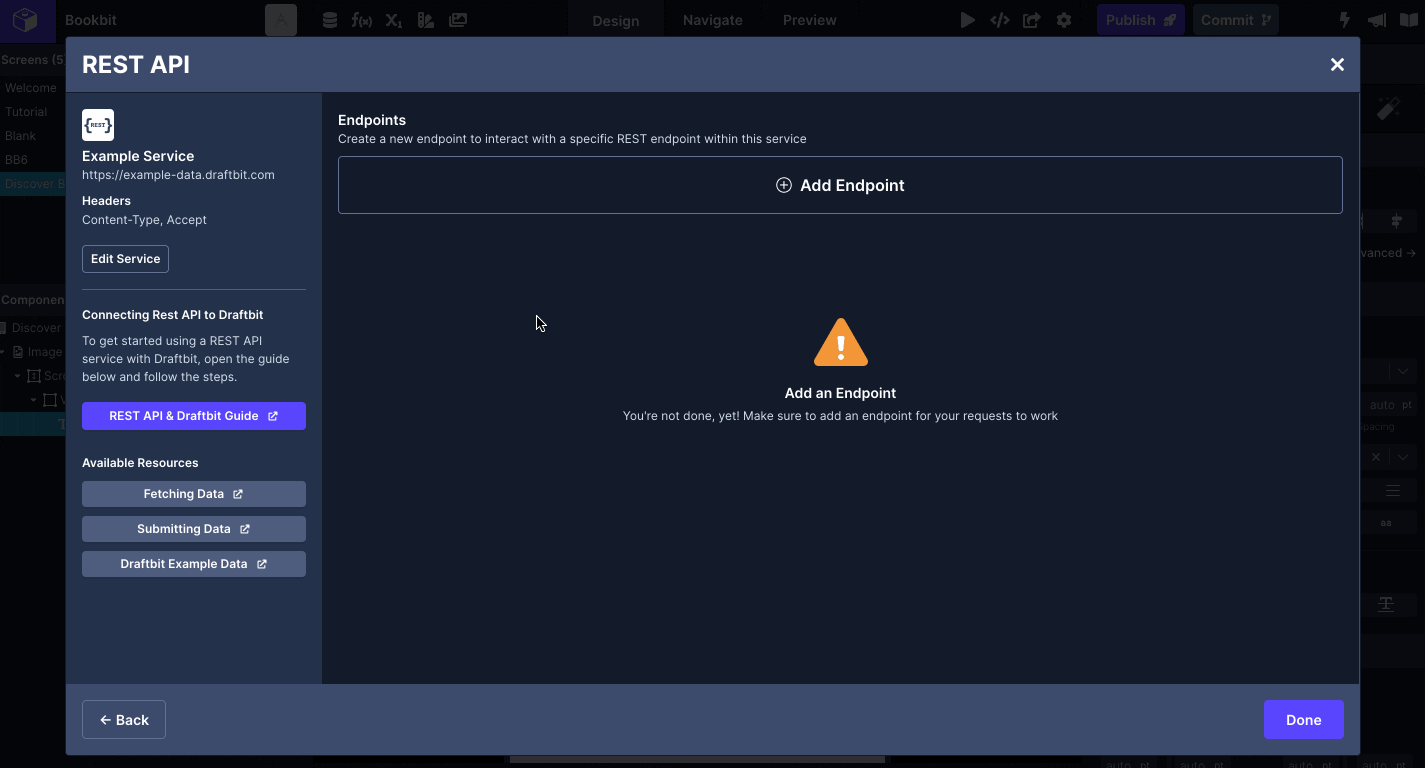
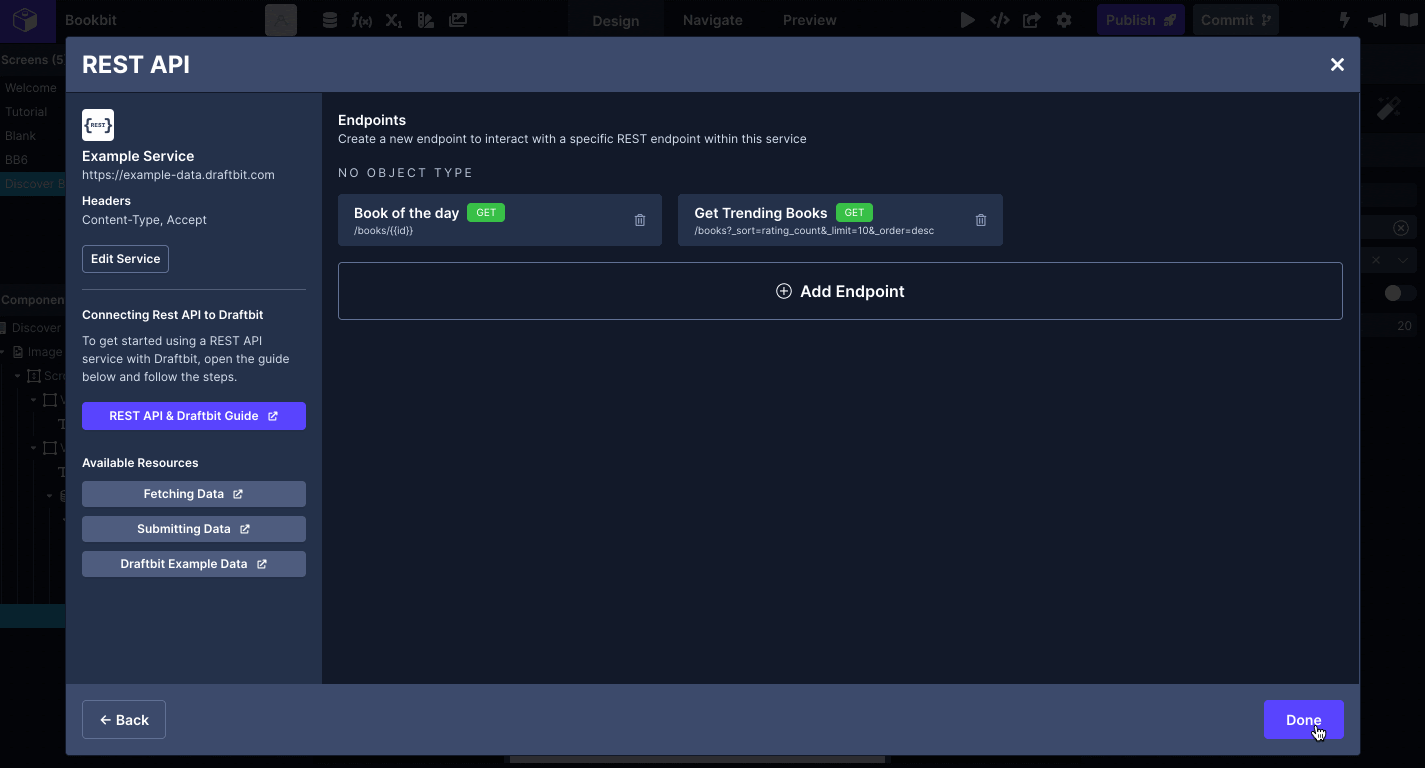
After you have created a new Service, you’ll be prompted to add new Endpoints for your service.
- To fetch the book item, create a new REST API endpoint. An API endpoint is the point of entry between an API and a server. The endpoint defines what information you are accessing from your API.
- Under the Endpoints menu, click the Create new endpoint button.
- Enter a name for this endpoint.
- Add the /books/{{id}} in Path & Parameters. The /books here is a required path to query one or many book items from the Example Data API. This section allows you to append a Base URL by adding parameters to fetch specific data from a REST API.
- Add a Test value for the {{id}}. The value of it could be anything that exists in the database using the API endpoint.
- Click the Test button next to the Endpoint input to verify the endpoint is working.
- Once everything looks right, click Save to save endpoint and click Done to close the modal.
Use the Fetch component to display data on the screen
In this section, let’s display the book item fetched in the Draftbit app.
- Add a View component adjacent to the previous one inside the ScrollView. Add padding-top and padding-bottom of value 34.
- Add a Text component to this View as a child. In the Styles tab, modify its Font to 18, and Align to center. Also, add a margin-bottom of 18. Then, add the text Book of the Day in the Data tab.

- Select the Fetch component from the Lists & Data component menu that contains elements specific to be used to pull data from an external resource. Add it as a direct child to the View.
- Go to the Configs tab of the Properties panel and select the Service as the REST API service created in the previous section.
- Select the endpoint to be used to pull the data.
- In the URL Structure, pass the value of 1 for the id.
- The Fetch component here allows previewing the data fetched from the API endpoint before consuming it in the app.
To display the data, let’s set up the Components tree:
- Add a View component under Fetch.
- Set its Align property to center and add two children View components.
- In the first child View component, add Image and give the View property of padding-bottom of 20 in Styles tab.
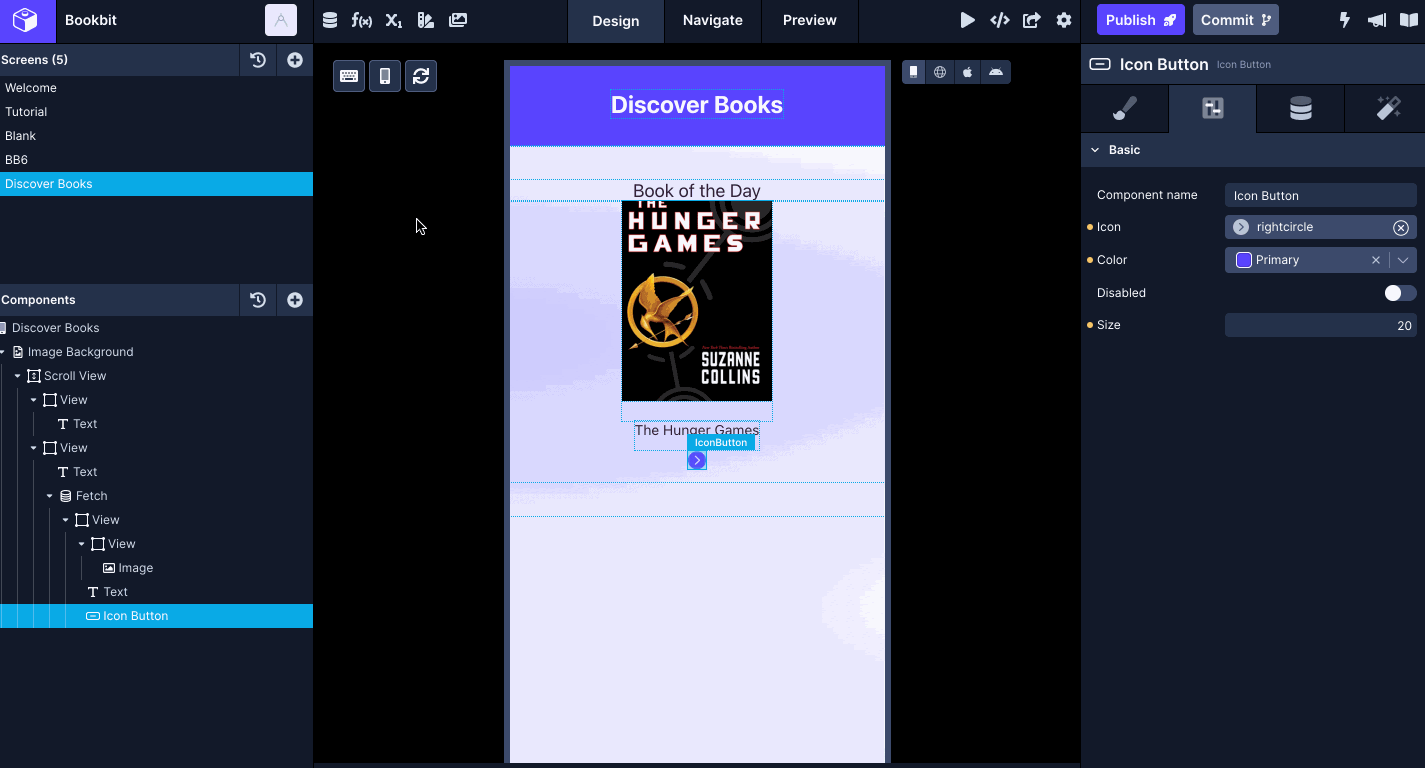
- Also, add the Text and Icon Button components adjacent to the View that wraps the Image component.
- On the Text and Icon Button components, add a padding-bottom of 12.
- Select the Image component, go to Data tab, select the Source Type to Data. Then, under the URL field, add a variable in curly braces {{url}}. Under Variables, from the dropdown menu, set the value to image_url.
- Similarly, select the Text component, go to Data tab, add {{title}} as a variable and under Variables, set the value to title.
- On the Icon Button, go to the Configs tab, set the Name of the icon to chevron-right-circle, the Color to Primary, and Size to 18.
Create Endpoints to display data in horizontal lists
Over the next two sections in this tutorial, the focus will be on creating two horizontal lists in the Discover Books screen. These lists are going to display multiple book items. In this section, let’s start by making these two endpoints.
- Open the API & Cloud services from the top panel.
- Click on the Example Service API under the Connected menu or the name you have given previously when connecting the REST API.
- Under the Endpoints menu, click the Create new endpoint button.
- Enter a name for this endpoint.
- The first endpoint is going to fetch the books by a parameter called rating_count. This parameter orders the list of book items according to their rating. Using the query parameter _sort, pass the rating_count as its value. Then, let’s set the _limit of the book items to fetch to 10. Lastly, pass the query parameter _order with a value of desc to order the book items in descending order.
- Append the Base URL by adding /books?_sort=rating_count&_limit=10&_order=desc in Path & Parameters.
- Click the Test button next to the Endpoint input to verify the endpoint is working.
- Once everything looks right, click Save to save endpoint and click Done to close the modal.
- Under the Endpoints menu, click the Create new endpoint button.
- Enter a name for this endpoint.
- This endpoint is going to fetch the book items listed on page 1. The pagination when using Example Data API requires to use a query parameter called _page.
- Append the Base URL by adding books?_page=1 in Path & Parameters.
- Click the Test button next to the Endpoint input to verify the endpoint is working.
- Once everything looks right, click Save to save endpoint and click Done to close the modal.
Create horizontal lists
The first horizontal list is going to display the books that are trending.
- Add the child View component to the ScrollView with a padding-top and bottom of 14 in the Styles tab.
- Add a Text component to this View to display a section title.
- In the Styles tab, set its Font to Default (Bold), Color to Custom, and Align to Center.
- Also, set the value of margin-bottom to 18. In the Data tab, set the title to Trending.
- Add a Fetch component from the Lists & Data component menu that contains components specific to be used to pull data from an external resource. Add it as a direct child to the View.
- Go to the Configs tab of the Properties panel and select the Service as the REST API service created in the previous section.
- Select the endpoint to be used to pull the data.
- The Fetch component here allows previewing the data fetched from the API endpoint before consuming it in the app.
- Add List as a child component to the Fetch from Lists & Data.
- In the Configs tab, enable the Horizontal. Go to the Styles tab, and add a padding-left of 18.
- In the Data tab, set the value of Mapped data value to Top-level response.
- Add View as a child component to List. It is going to represent an individual book item in the list. In the Styles tab, set the margin-right of 18.
- Add a Touchable.
- Inside the Touchable, add another View component its child.
- In the Styles tab for View, set the Width to 80 and Height to 118.
- Add Image to the View. In the Styles tab, set its Width to 80 and Height to 118. In the Data tab, set the Source Type to Data and then select the Source Type to data and a {{url}} variable**.** Under Variables, set its value to image_url.
The second horizontal list is going to have the same UI elements we have just created. It differs only in the list title and data source.
You can use the option to Duplicate the whole custom block. Then, change its title and data source.
Here is the final output:
Resources
- The complete REST API endpoints documentation in Draftbit
- The complete list of REST API service integrations available in Draftbit
💜 We at Draftbit love our Community and are always open for your questions, feedback and feature requests. You will also find more resources to learn and build with Draftbit.
Reach out to us on twitter/@draftbit for more questions.