
How To Create a Native Mobile App For Your Supabase Back-End
This tutorial will show you how to create a native mobile app from scratch using Supabase as the back-end database and Draftbit as the React Native builder.
 Shanika Wickramasingheon September 23, 2021
This tutorial will show you how to create a native mobile app from scratch using Supabase as the back-end database and Draftbit as the mobile app. Draftbit is an interactive visual development platform based on open-source frameworks and libraries. So you will be using open-source React Native to build your mobile app. Draftbit ships a preconfigured Supabase integration — see what’s included before you start.
Using a REST API, you can integrate your Draftbit app to any back-end-as-a-service (BaaS) platform like Backendless, Xano, or Contentful. If you want to know more about how to do that, you can refer to these guides.
Introduction
This tutorial is for you if you already have a Supabase back-end and are very familiar with it. But if you do not have a Supabase account, you can create one here. Supabase makes creating endpoints a very easy task, and I will show you what API endpoints you need to use from Supabase for data manipulation.
In this tutorial, we will show you how to:
- Connect a Supabase back-end to a Draftbit mobile app.
- Fetch data from the Supabase back-end and populate them into a List View screen of your Draftbit mobile app.
- Fetch only one record from the Supabase back-end and populate it into an Item View screen of your Draftbit mobile app.
- Create a new record in a Supabase database through your Draftbit mobile app.
- Update a record in a Supabase database through your Draftbit mobile app.
- Delete a record in a Supabase database through your Draftbit mobile app.
Now let’s move on to setting up your data and API in Supabase.
Set up your data & API in Supabase
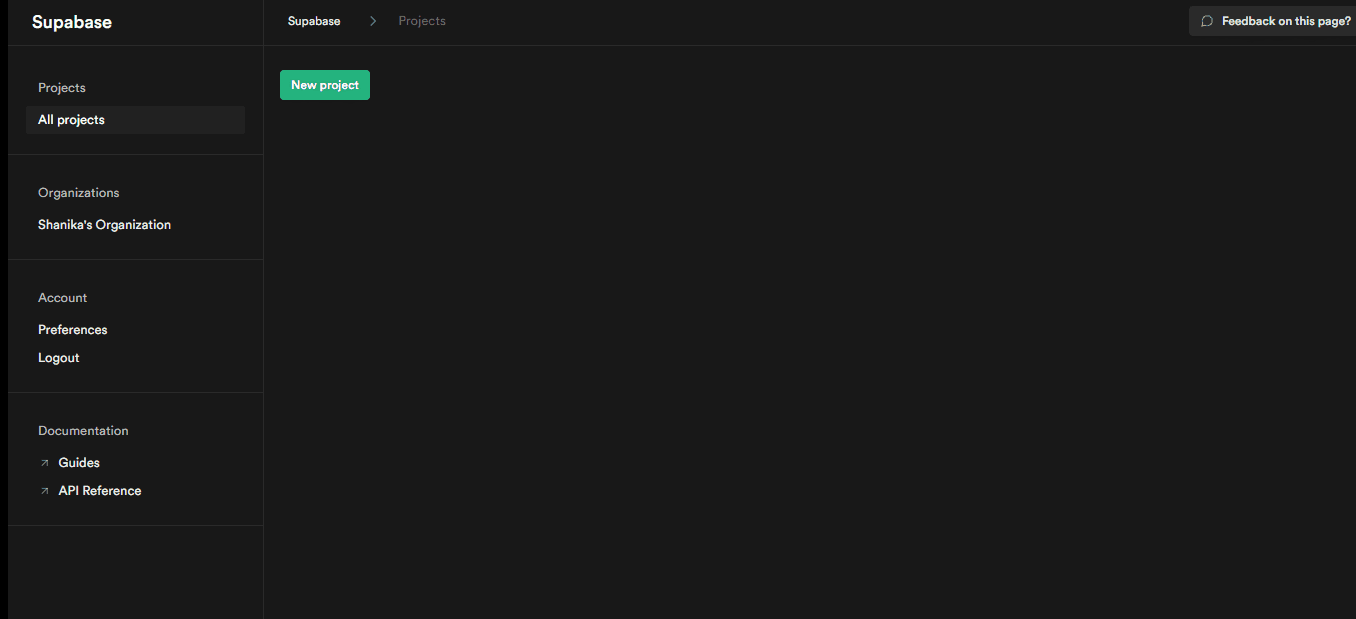
First of all, in your Supabase account, you need to create a new database. Here’s how you can do that:
- Click `New Project` to create a new database.
- Choose your organization from the modal, enter a name and a password for the project, select a region to host it, and click the Next button.
- After initializing a project in Supabase, click on the project to see the project dashboard.
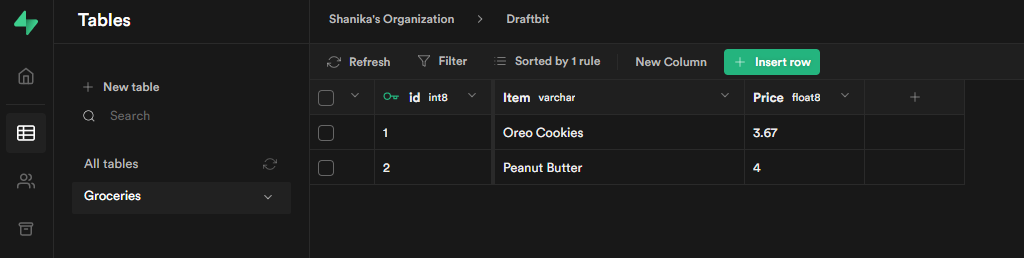
Select the database panel from your project dashboard, select the database panel, click on the Table Editor, and add New Table. For this tutorial, we will add a new data table called Groceries with two columns and add the following data for the two columns.
- Item: {Oreo Cookies, Peanut Butter}
- Price: {3.67,4}
Now we have got our table with some data in it. To access the data in this table, we need to use the REST API that Superbase provides. To connect the API in the Draftbit app, you need the following two values:
- Base URL of the REST API, which is in the format: https://
.supabase.co/rest/v1 where the is a unique domain name generated by Supabase. - The SUPABASE_KEY is the secret key.
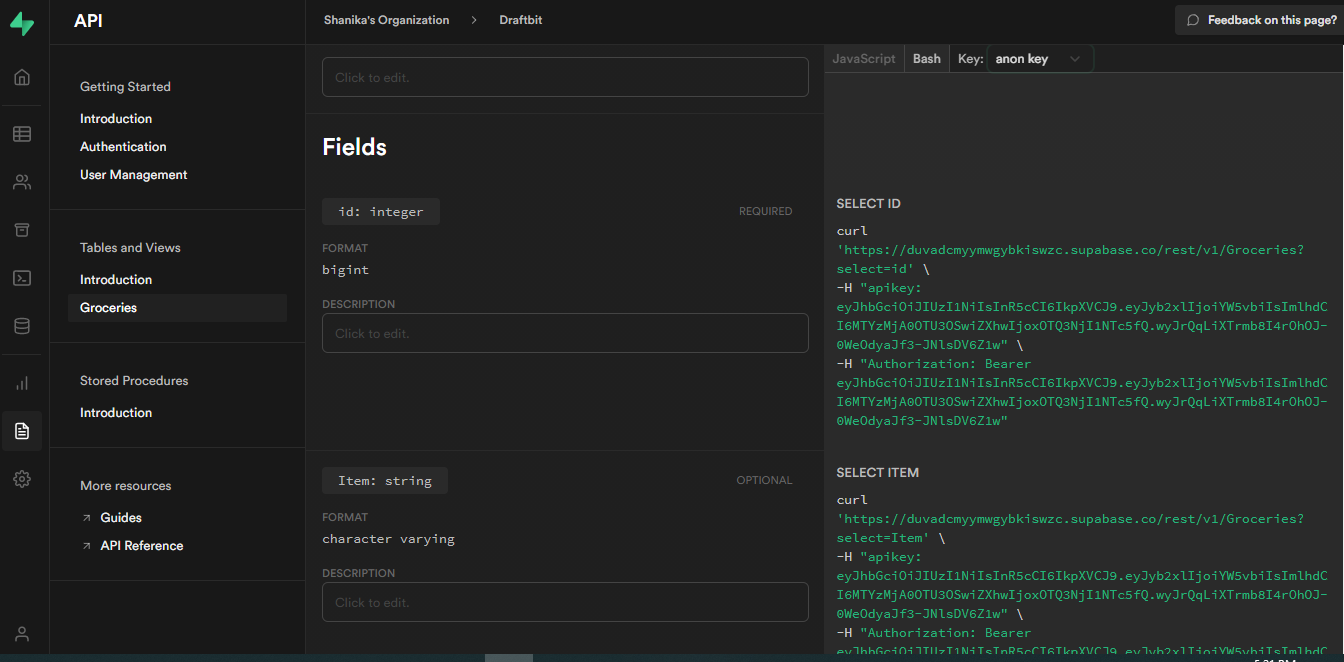
You can all these unique values from the API button on the left menu bar of your Supabase’s dashboard. Let’s go there and do the following.
- Click on the table name(Groceries) in the Table and Views section
- From the right specs panel, switch to the tab that says Bash. Then you will find the Base URL, the SUPABASE_KEY, and the headers you need to pass for a specific HTTP request you send from the Draftbit app.
- To view the SUPABASE_KEY, switch the Key mode from Hide to anon
Set up your Draftbit front-end
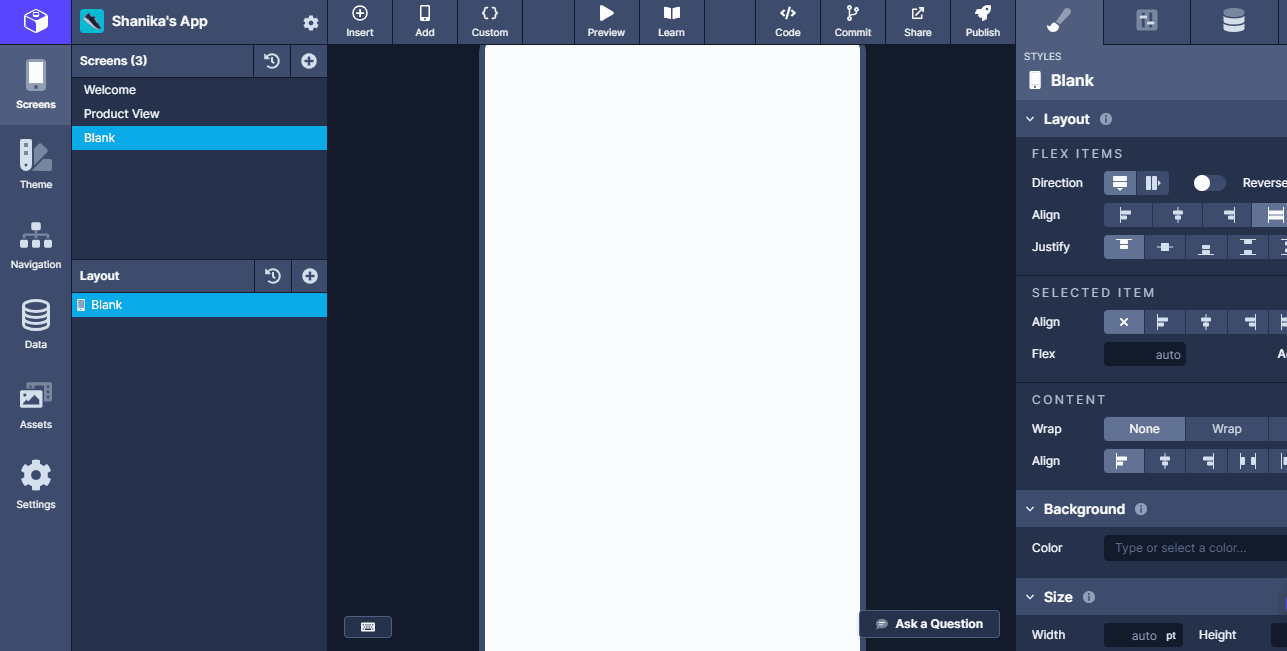
If you don’t have a Draftbit account, create one here. Once you’ve got your account set up, Create a New App. For this demo, you can select Start From a Blank App and proceed to the Builder.
Connect Supabase to Draftbit
First, add Authorization and apikey headers to your Draftbit app. To do that, go through the following steps.
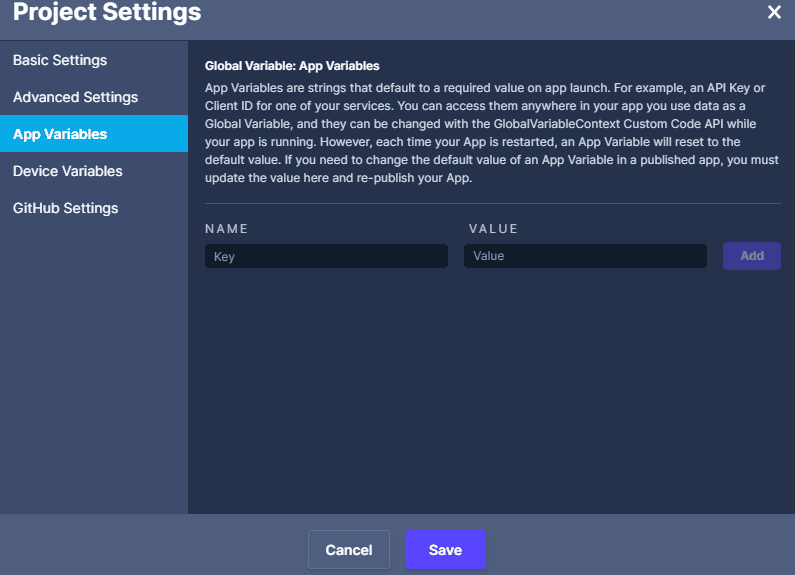
- Open the Settings tab on the left-navbar.
- In the Project Settings panel that opens, navigate to App Variables.
- Copy the apikey from the Supabase and add Authorization and APIKey header values.
- The Authorization header value requires you to enter a Bearer token. The syntax is Bearer <SUPABASE_KEY>.
- Enter another key to access the apikey header and the value for it.
- The apikey header value requires you to enter the Supabase key. The syntax is <SUPABASE_KEY>.
- In place of <SUPABASE_KEY> paste your own (from the previous section) and then click Add.
- Click Save.
Next, do the following steps to add the Supabase API information in your Draftbit app.
- Open the Data tab from the left navbar.
- From the Add your custom API menu, click on Add Rest API.
- In Step 1, give a name to your REST API service and then paste your Base URL into the Base URL input field.
- In Step 2, Click the + from the Headers & authentication section to add a new Header.
- Type Authorization for the key.
- Select the Global Variable for Authorization you added in the previous section.
- Type apikey for the key of another header.
- Select the Global Variable for apikey you added in the previous section.
- Click Save.
Now that we’ve got the Supabase base service connecting to a Draftbit app, we can utilize all of Supabase’s HTTP methods to access and manipulate data.
In the next section, we will GET a list of data, GET an individual item from the Supabase database and POST a new item to it.
GET: Populate a List View screen with list data from Supabase
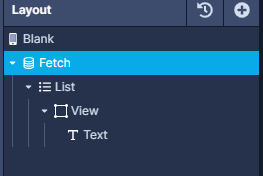
In a blank screen in Draftbit, add the following components as nested components.
- Fetch
- List
- View
- Text
After adding them, your Layout Tree will look like the following screenshot.
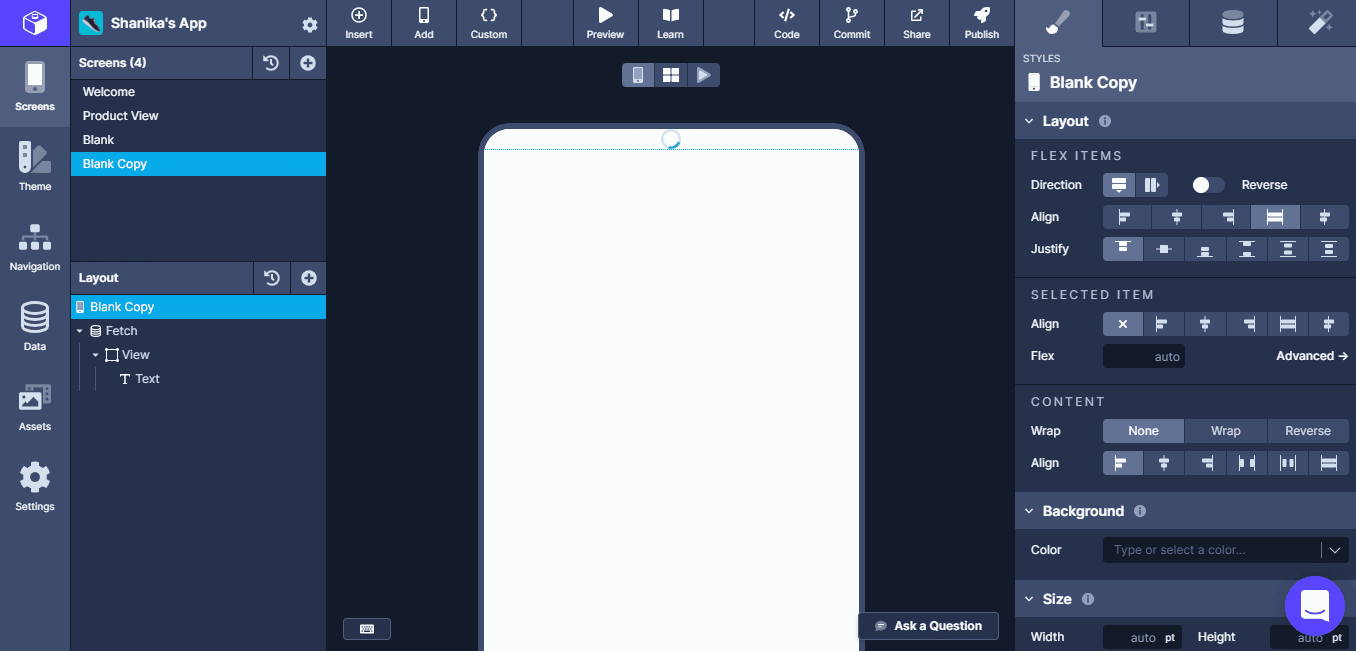
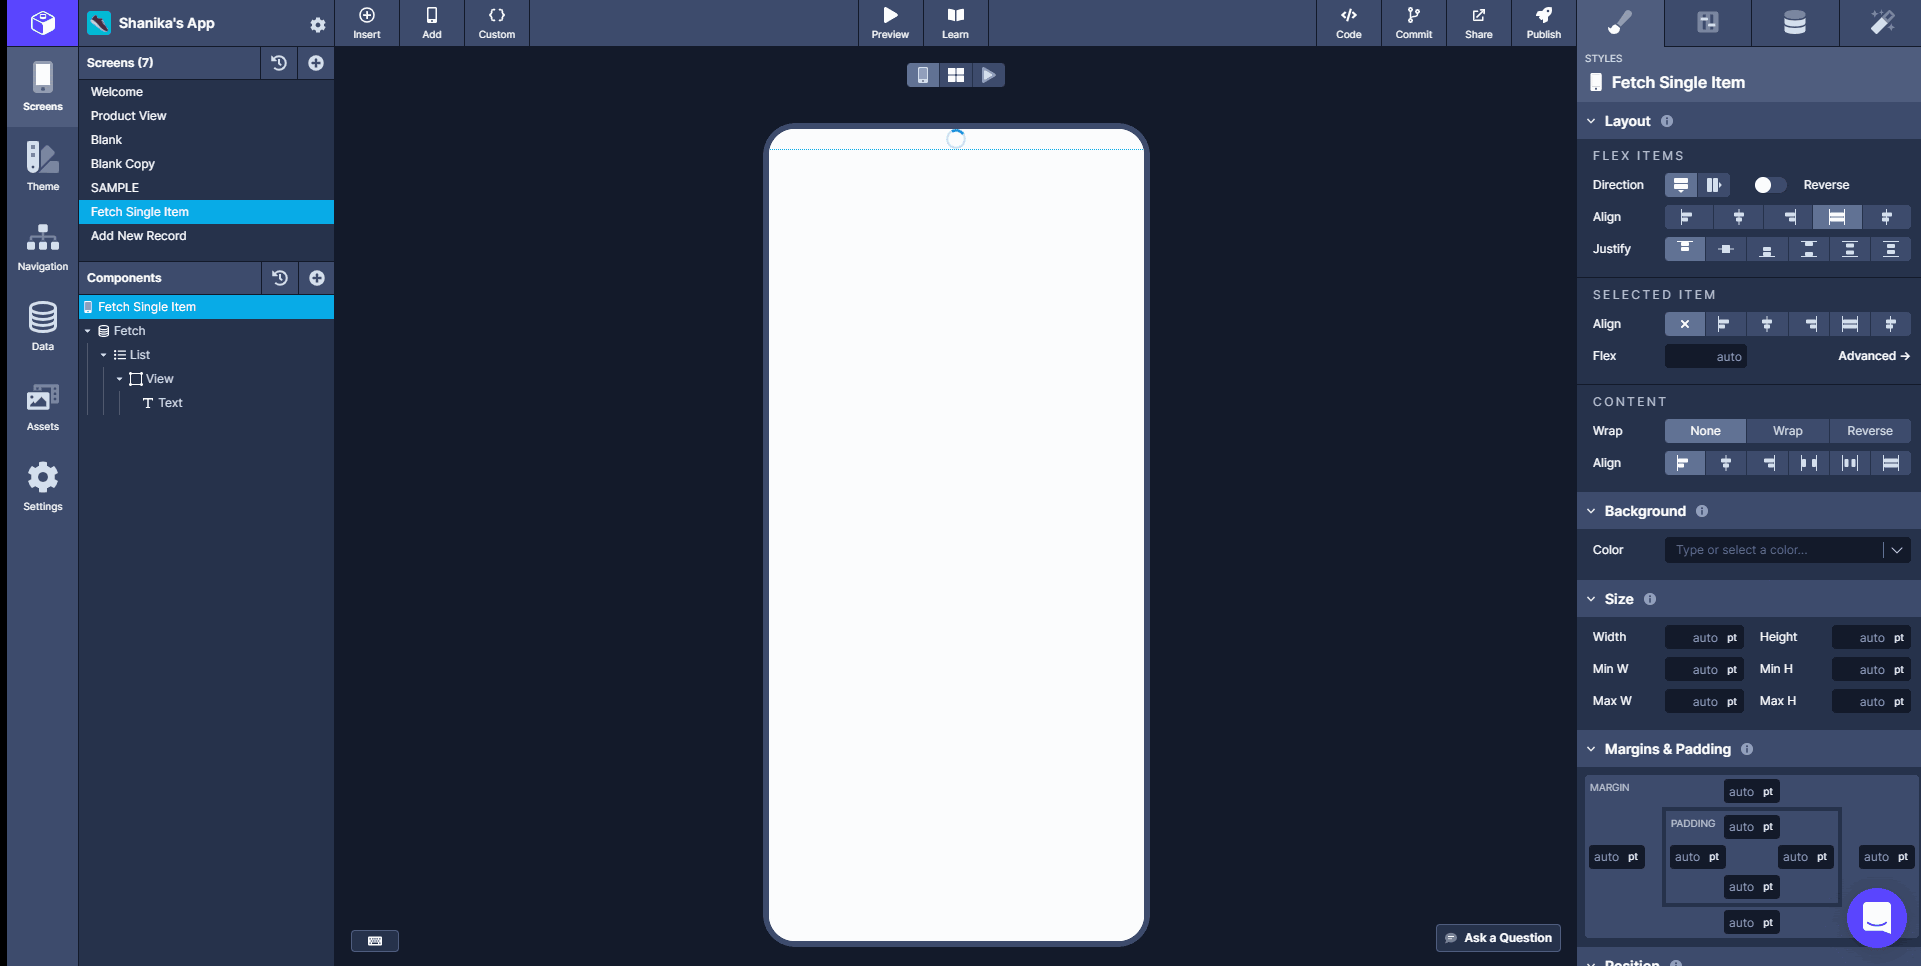
Initially, you will see an empty or a loading screen because we haven’t populated the components’ data. We will do that in the next sections.
Now, open the Data menu from the left-hand navbar as you did previously, and do the following steps in the popup modal as illustrated from the below gif.
- Select your Supabase API service, and click Create New endpoint.
- In Step 1, Give a name to your endpoint and leave GET as the HTTP method.
- In Step 2 Paths and Prameters section, add the /
?select=* to the URL path (in our Groceries example, it’s /Groceries?select=* ). - You can safely skip Step 3.
- In Step 4, click on Test to test your endpoint.
If you did the above steps correctly, you should get a 200 OK response with data in your schema in Supabase as a JSON object. If you got a bad response, make sure that you copied & pasted your Base URL and Table Name paths correctly and that your data table has actual data in it. After creating the endpoints, Save & close the modal.
Next, we need to map the GET request’s response to the components on your screen in Draftbit. You can see how to do that in the GIF below.
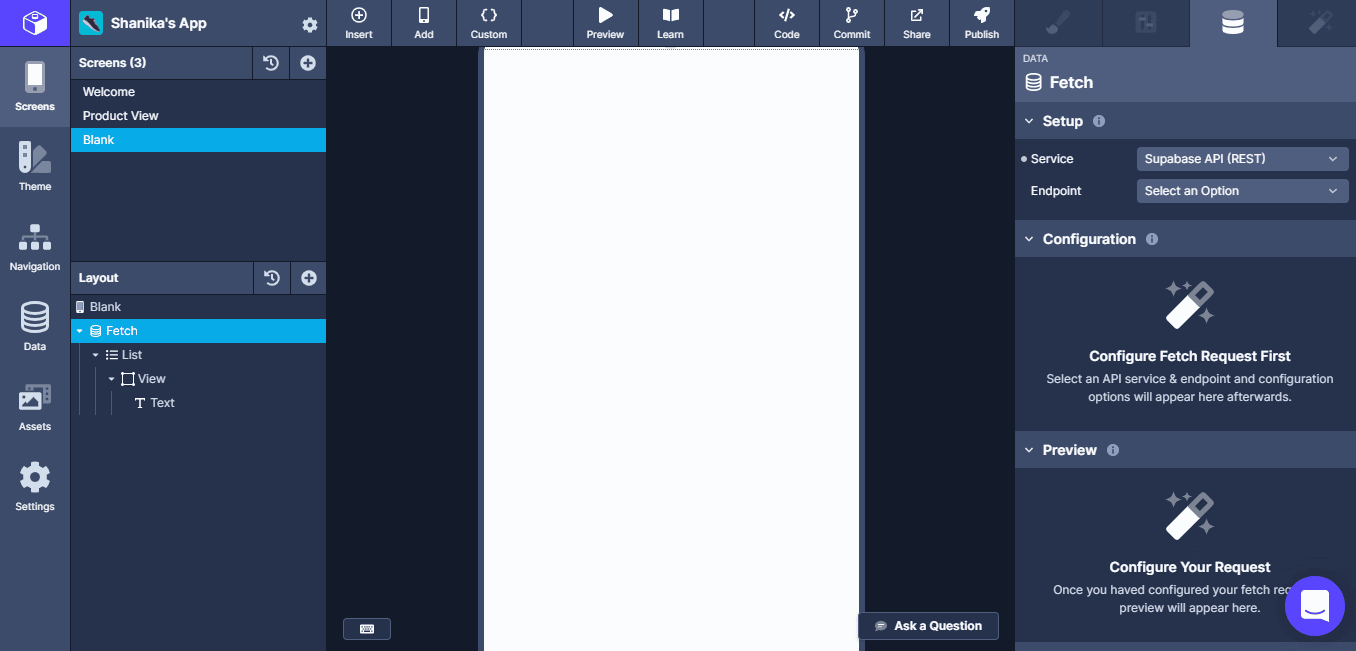
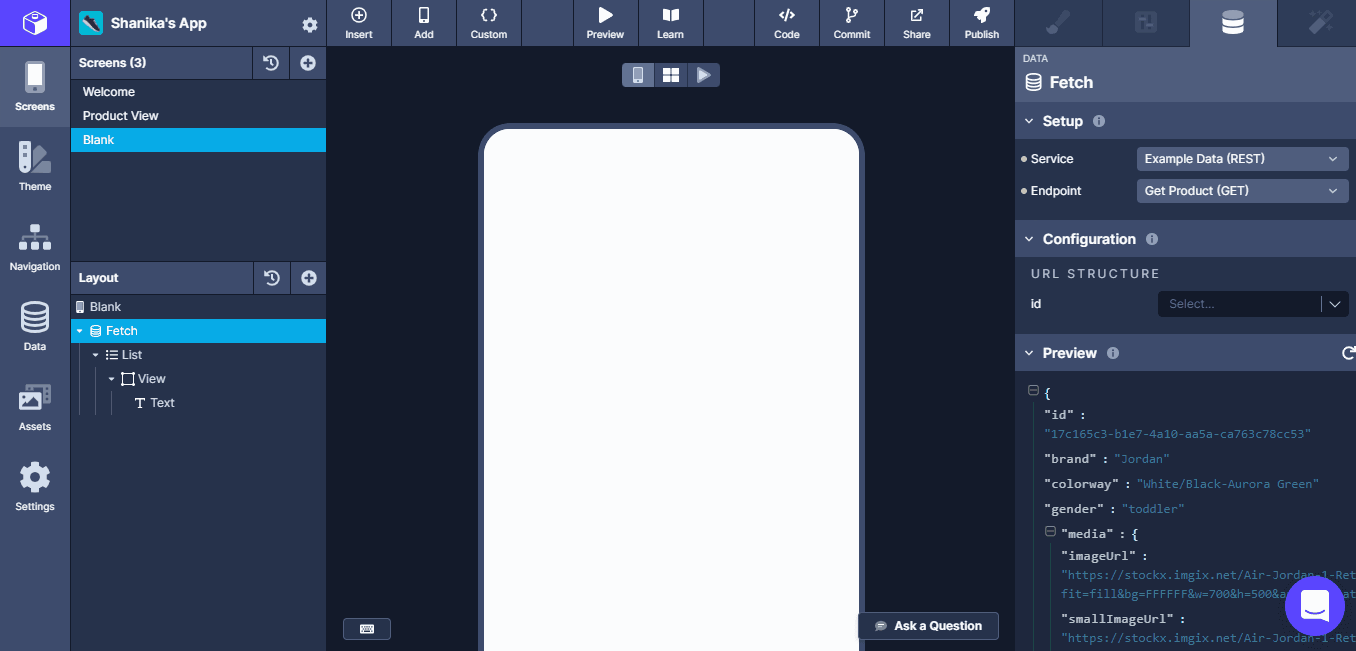
- From the Layout Tree, select the Fetch component.
- From the Data tab of the Properties panel (3rd from the left), select the Supabase base API service and GET endpoint you have just created. After creating it, you should see the same JSON response in the Fetch Preview when testing the GET endpoint.
- Next, select the List component in the Layout Tree. From its Data tab, select the Top-level response for its Data field
Now all is set to map data variables to the text component.
- In this example, we typed two data variables into a single Text component: {{itemName}} and {{price}} in the input text field in its data tab
- and then in the variables section, map those field values ‘Item’ and ‘Price,’ respectively, to the data variables.
If you did this correctly, you should see the screen populated with fetched data from your endpoint from the preview.
GET: Populate an Item View screen with single-item data from Supabase
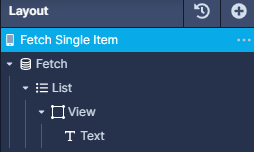
Again add a new blank screen in Draftbit, add the following components as nested components.
- Fetch
- List
- View
- Text
After adding them, your Layout Tree will lo like the following screenshot.
Next, open the Data menu from the left-hand navbar as you did previously, and do the following steps in the popup modal as illustrated from the below gif.
- Select your Supabase API service, and click Create new endpoint.
- In Step 1, give a name to your endpoint and leave GET as the HTTP method.
- In Step 2 Paths and Parameters section, add /
/?select=*&id=eq.{{id}} to the URL path (in our Groceries example, it’s /Groceries/?select=*&id=eq.{{id}}) - Next, add the test value for {{id}}.
- Skip Step 3.
- Click Test to test your endpoint.
If you did the above steps correctly, you should get a 200 OK response with exactly one result for the test value you input from your schema in Supabase as a JSON object. If you got a bad response, make sure that you copied & pasted your Base URL and Table Name paths correctly and that your data table has actual data in it. After creating the endpoints, Save & close the modal.
Next, we need to map the GET request’s response to the components on your screen in Draftbit. You can see how to do that in the GIF below.
- From the Layout Tree, select the Fetch component.
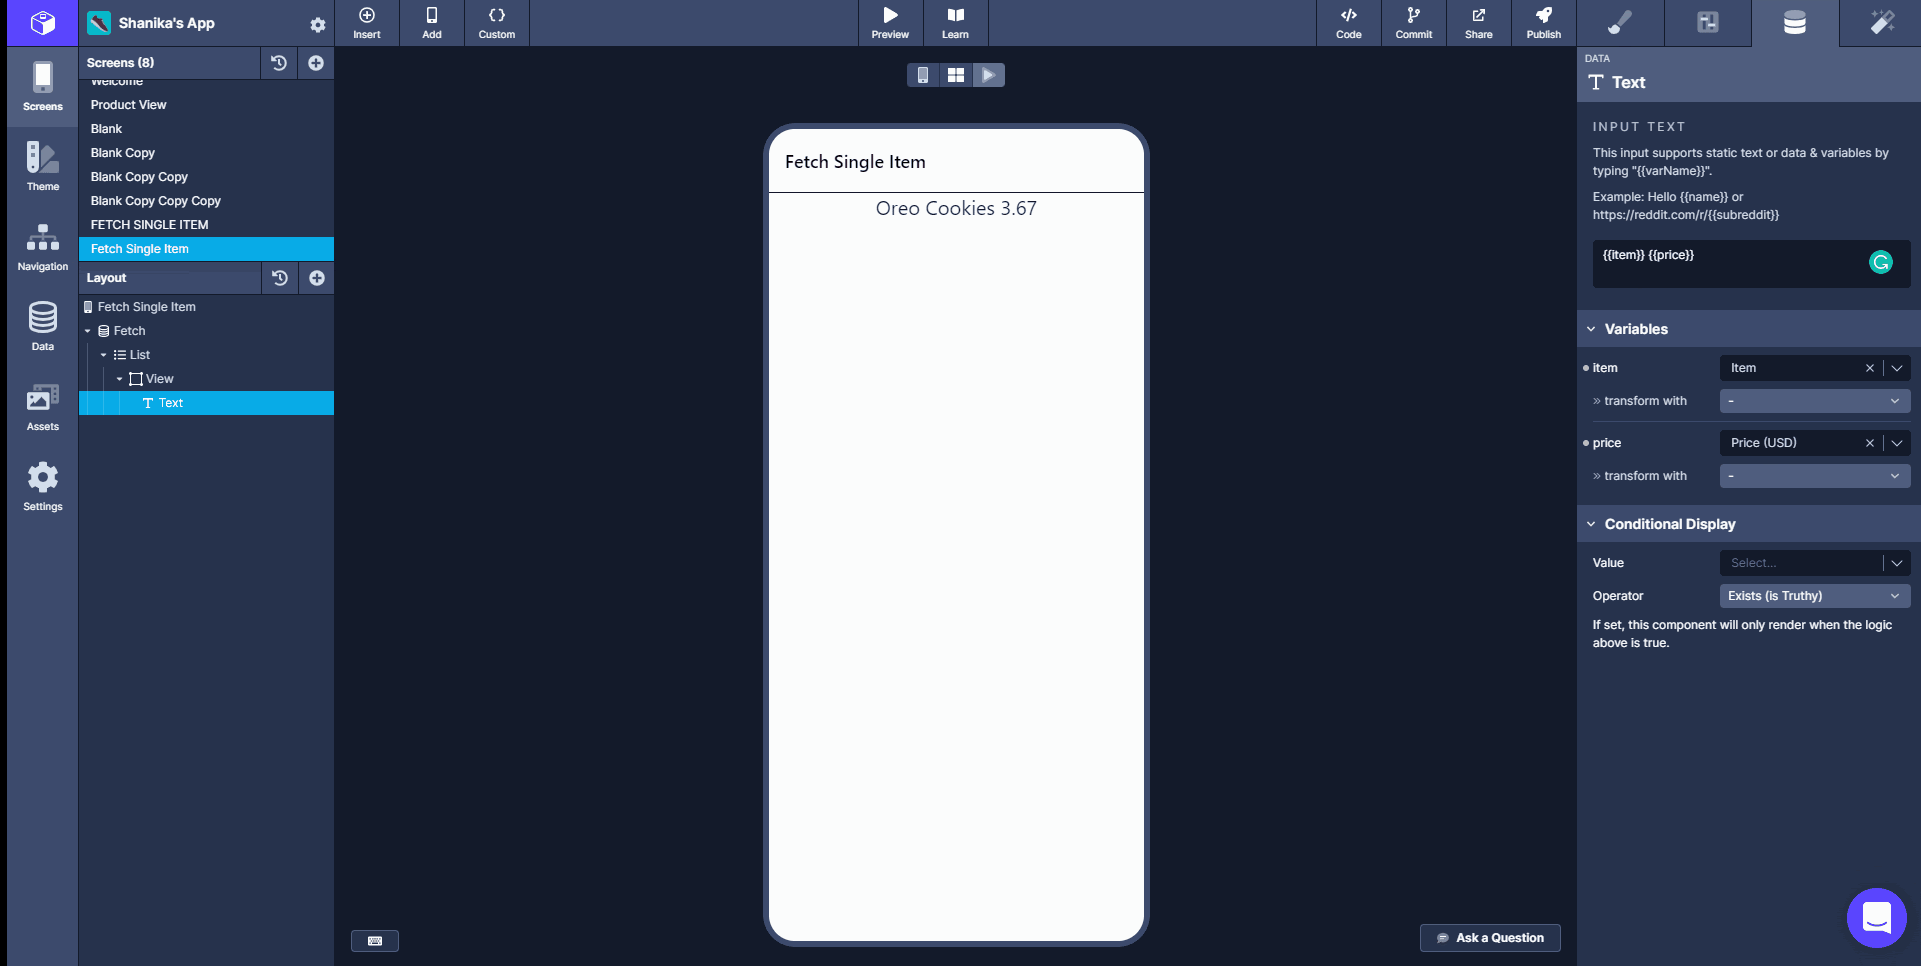
- From the Data tab of the Properties panel (3rd from the left), select the Supabase base API service and GET endpoint you have just created. In the ‘Configurations’ Panel, select enter no 1 to select only the first record.
After creating it, you should see the same JSON response in the Fetch Preview when testing the GET endpoint. Now all is set to map data variables to the text component.
- Next, select the List component in the Layout Tree. From its Data tab, select the Top-level response for its Data field.
- Type the data variables as {{item}} and {{price}} in the input text field of the Text components’ data tab.
- Then in the variables section, map those field values ‘item’ and ‘price,’ respectively, to the data variables.
You should see a single item populated with fetched data from your endpoint like in the following figure if you did this correctly.
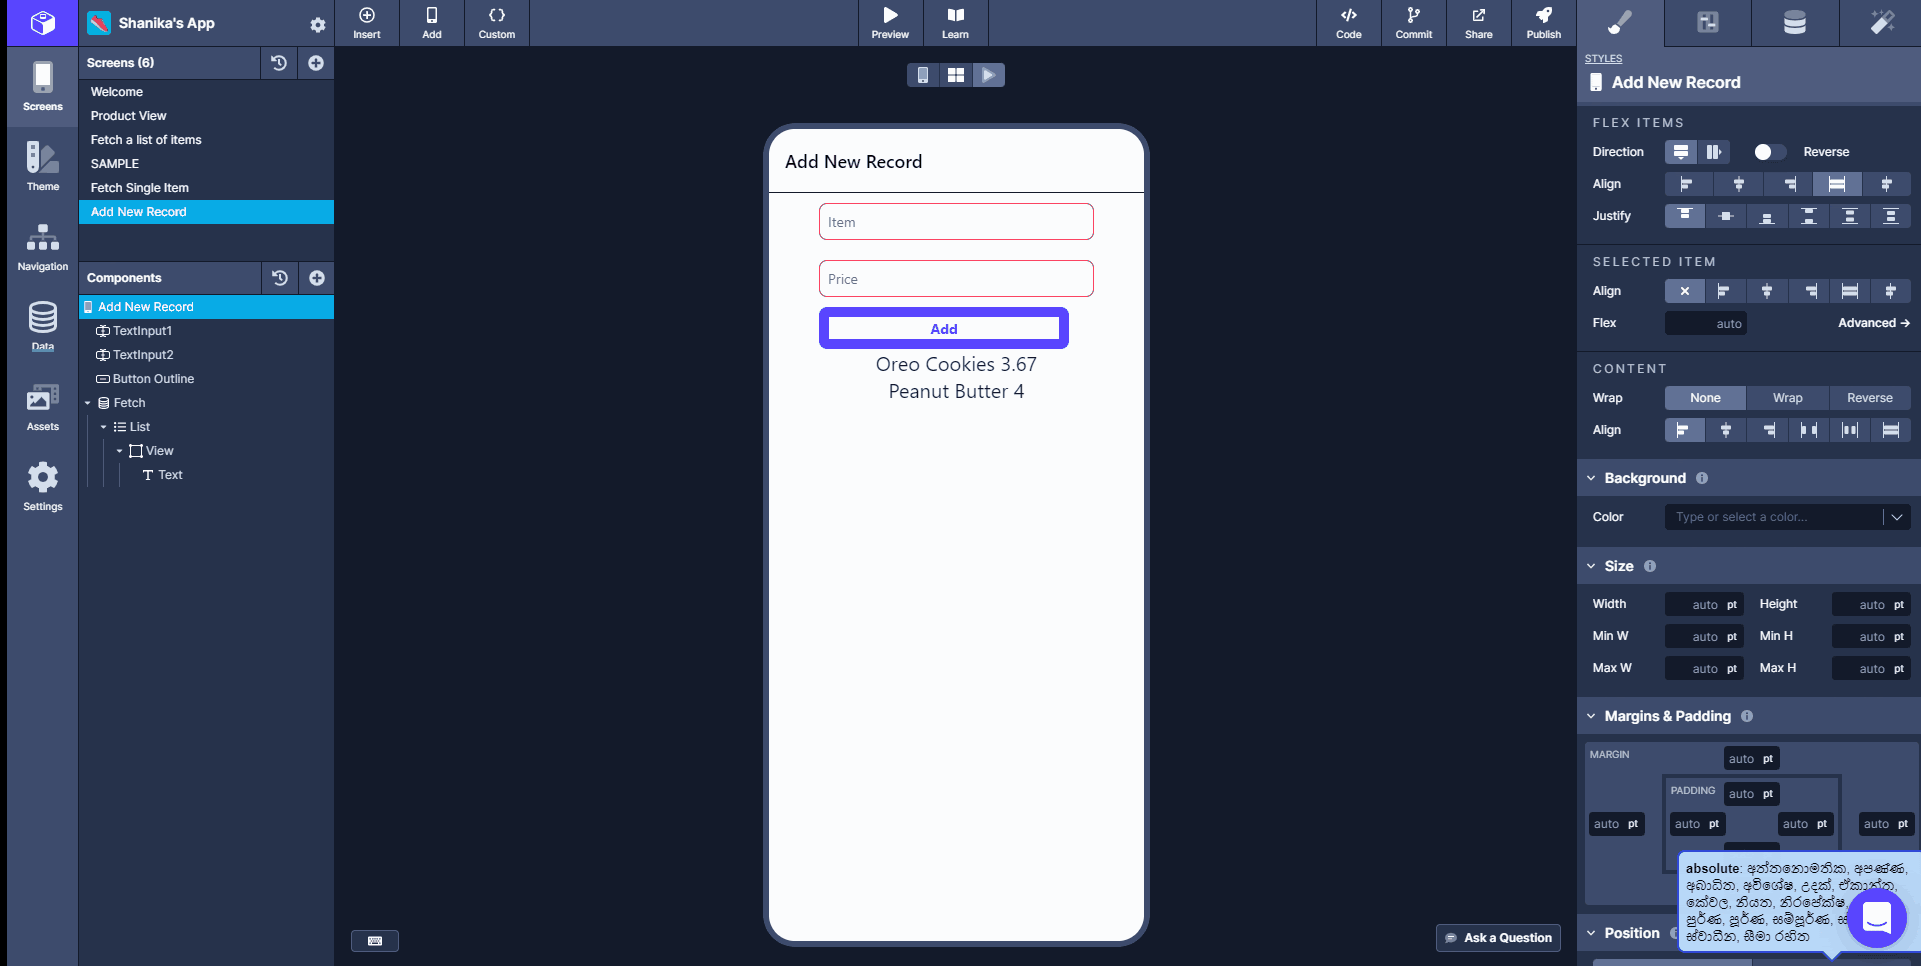
POST: Create a new record in a Supabase database
Now that we are familiar with fetching data from a Supabase back-end into our mobile app front-end let’s try adding a new record in our Supabase table.
For this section, you need to use at least one component that accepts user input and has a Field Name prop to POST data using Supabase REST API. You can use one of the following components for that.
In addition, you need a Touchable component like a Button to attach the POST action. After you have created these components, we will create our POST endpoint.
Now, open the Data menu from the left-hand navbar as you did previously, and do the following steps in the popup modal as illustrated from the below gif.
-
Select your Supabase API service, and click New Endpoint.
-
In Step 1, give a name to your endpoint and select POST as the HTTP method.
-
In Step 2 Paths and Parameters section, add your /
to the URL path (in our Groceries example, it’s /Groceries ). -
In Step 3, we need to define the JSON Body Structure that will shape the request. For our simple example, the Body Structure will look like this:
{
“Item”: {{item}},
“Price”: {{price}}
}
Set test values for your two data variables.
- In Step 4, enter the header ‘Prefer’ and its value ‘return=representation.’
- In Step 5, Click Test to test your endpoint.
Once you follow the above steps, you should get a 200 OK response with exactly the new record as a JSON you have entered for your schema. In case you get a bad response, make sure that you copied & pasted your Base URL and Table Name paths correctly and that your data table has actual data in it. After creating the endpoints, Save & close the modal.
Now we have a working POST request. Let’s map its response to the components on your screen in Draftbit. You can see how to do that in the GIF below.
-
First, for each input component, make sure you have set the Field Names (found in the Configs tab, second from the left) to unique values. Name the two Text Input components’ field names as “Item” and “Price,” respectively.
-
Next, on your Touchable component (Add Button), go to the Interactions tab on the Button Outline section located on the far-right-hand side.
-
Select the Supabase API Service and the Add New Record Endpoint.
-
Then add the configuration for the body request to be sent by selecting the values for {{Item}} and {{Price}} input fields.
After completing the above steps, you should see the list view populated with fetched data, including the newly added item from your endpoint if you did this correctly.
PATCH: Update a new record in a Supabase database
Now we know how to enter a new record to the Supabase database from our mobile app front-end. Let’s try updating an existing record there. Open the Data menu from the left-hand navbar, and do the following steps in the popup modal as illustrated below.
-
Select your Supabase API service, and click New Endpoint.
-
In Step 1, give a name to your endpoint and select PATCH as the HTTP method.
-
In Step 2 Paths and Parameters section, add your /
?column-name=eq.{{column-name}} to the URL path (in our Groceries example, it’s /Groceries?id=eq.{{id}} ). -
Enter the value for the variable {{id}}.
-
In Step 3, we need to define the JSON Body Structure that will shape the request. For our simple example, the Body Structure will look like this:
{
“Item”: {{itemName}},
}
- Enter the value for the {{itemName}} or the value you want to replace.
- In Step 4, enter the header ‘Prefer’ and its value ‘return=representation.’
- In Step 5, Click Test to test your endpoint.

If you follow the above steps correctly, you should get a 200 OK response with the updated record as a JSON response. In case you get a bad response, make sure that you copied & pasted your Base URL and Table Name paths correctly and that your data table has actual data in it. After creating the endpoints, Save & close the modal.
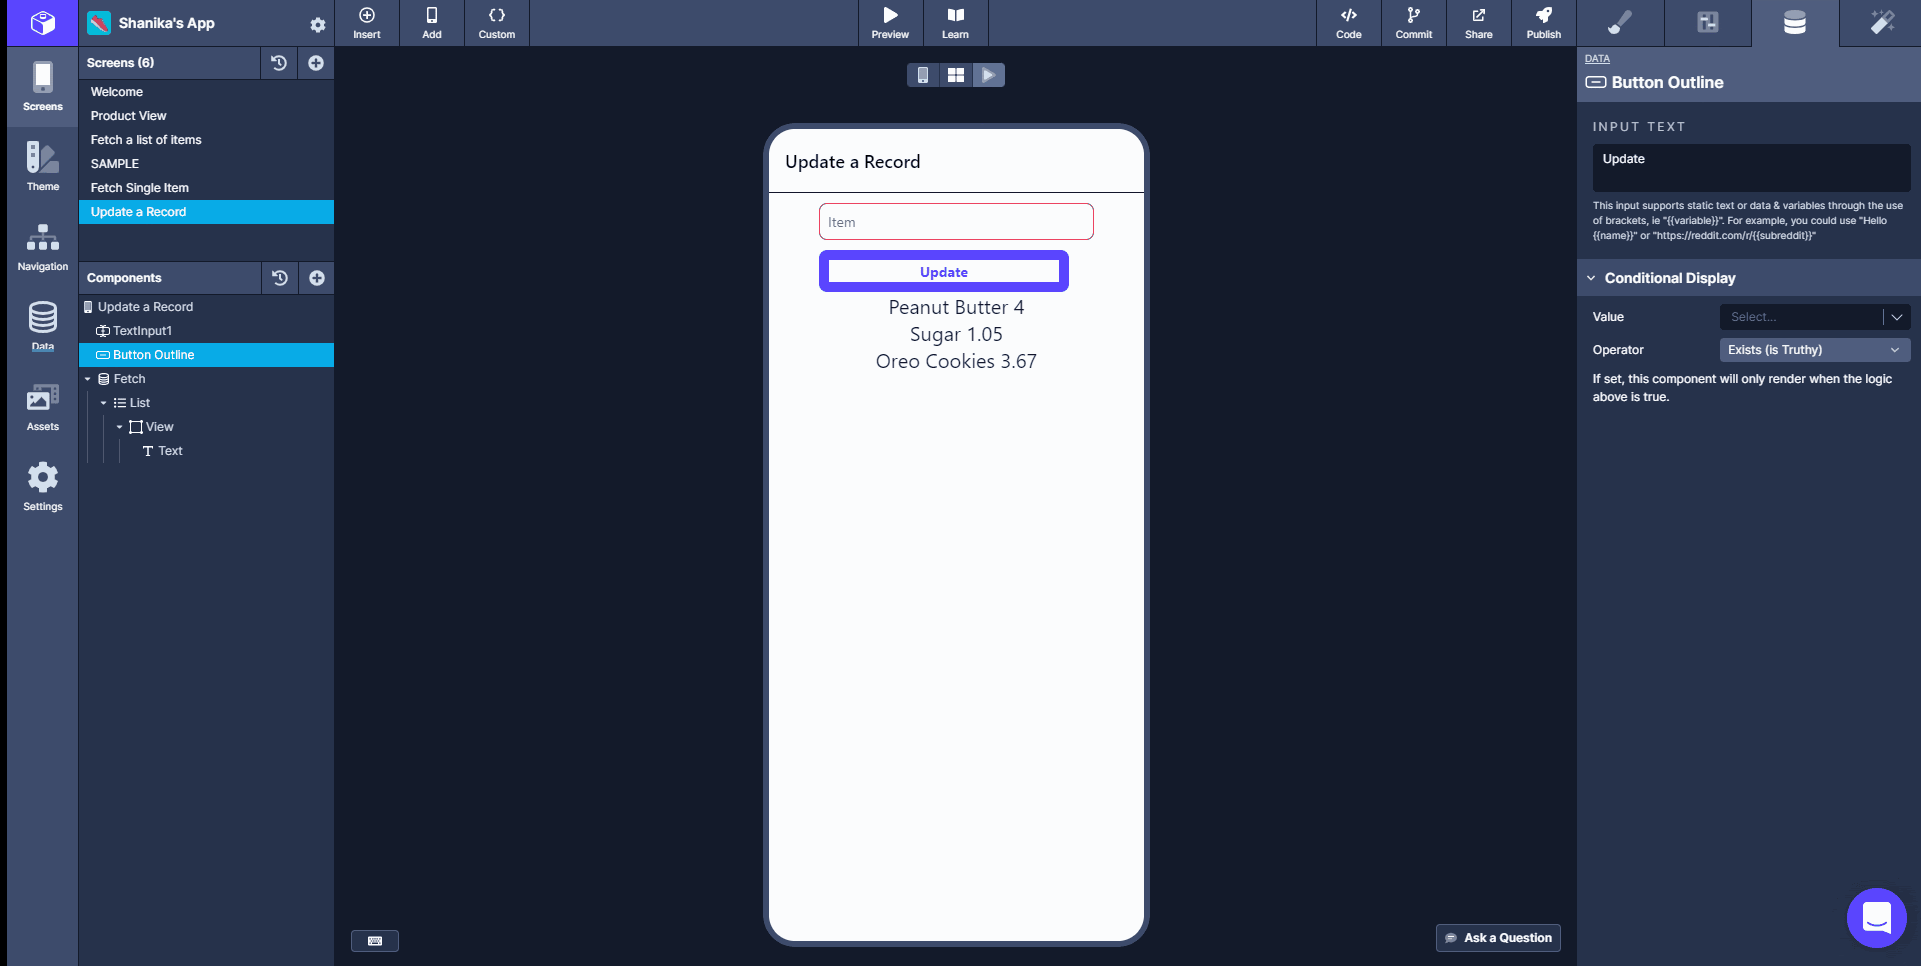
Now we have a working PATCH request. Let’s map its response to the components on your screen in Draftbit. Like you created text inputs to enter data, create one text input and a Touchable Component to send updates. The below gif shows you how to continue with the rest of the steps.
-
First, in the input component, make sure you have set the Field Name (found in the Configs tab, second from the left) as “Item.”
-
Next, on your Touchable component (Update Button), go to the Interactions tab on the Button Outline section located on the far-right-hand side.
-
Select the Supabase API Service and the Update a Record Endpoint you created.
-
Then add the configuration for the body request to be sent by selecting the values for {{id}} and the {{Item}} input field.
After completing the above steps, you should see the list view populated with the updated data,
DELETE: Delete records in a Supabase database
Finally, we will delete an existing record in our Supabase database. Open the Data menu from the left-hand navbar,
- Select your Supabase API service, and click New Endpoint.
- In Step 1, give a name to your endpoint and select DELETE as the HTTP method.
- In Step 2 Paths and Parameters section, add your /
?column-name=eq.{{column-name}} to the URL path (in our Groceries example, it’s /Groceries?id=eq.{{id}} ). - Enter the value for the variable {{id}}.
- You can skip Steps 4 and 5.
- In Step 5, Click Test to test your endpoint.
If you correctly follow the above steps, you should get a 200 OK response with an empty JSON response. In case you get a bad response, make sure that you copied & pasted your Base URL and Table Name paths correctly and that your data table has actual data in it. After creating the endpoints, Save & close the modal.
As you did in the previous section, you can add a button to bind the delete endpoint. If you have done the configurations successfully, you will see no record in your Supabase database.
Wrapping up
How to do CRUD operations through your Draftbit mobile app is important for interacting with your Supabase database. This tutorial taught you how to GET a single item and a list of items from a Supabase back-end to your Draftbit app. Also, you learned how to add a new item, update an item and delete data in Supabase through the Draftbit front-end.